✅ We last checked all the steps in this guide on iPhone 8 and iPhone 8 Plus with 17.2.1 installed. The latest iOS version is 17.2.1.
Don’t you know that having iPhone 8 or iPhone 8 Plus can also support your professional work? You can now get benefits from it that will support your work. One of the things that you can do is scan documents. And the good news is that Apple provides it with high technology so the scanning result will not disappoint you. You can quickly scan all kinds of documents and it works on both iPhone 8 and iPhone 8 Plus. If you want to scan documents using iPhone 8, follow the simple guide for iPhone 8 below.
How to Scan Document Using iPhone 8 Quickly (iOS 11)
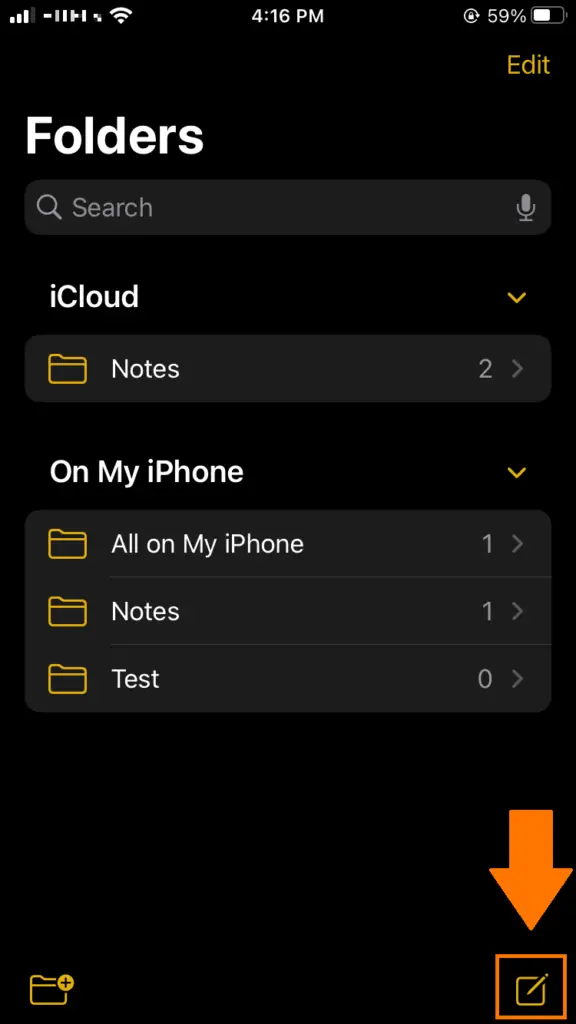
To scan the document using your iPhone 8, open the Notes app and then add a new note. After that, tap the plus icon. It is at the bottom of the screen. You will see the Scan Documents menu and tap it to scan your documents.

After the document scanning interface is open, you can begin to scan it. The camera will read the object that is detected as a document.
How to Scan Documents Using iPhone 8 (on iOS 12 to IOS 15.5)
During the recent update, Apple removed the plus button, which leads to some confusion for people looking to scan documents on their iPhone8.
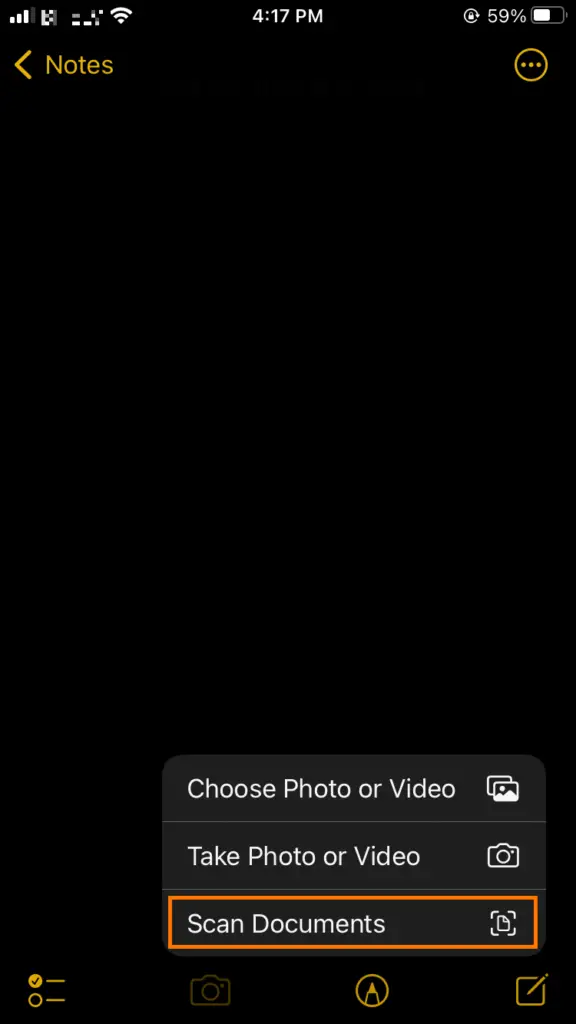
Here’s how you can scan documents on iOS12 and iOS13. Go to the Notes app, create a new note and then press the Photo icon, then select “Scan Documents”.

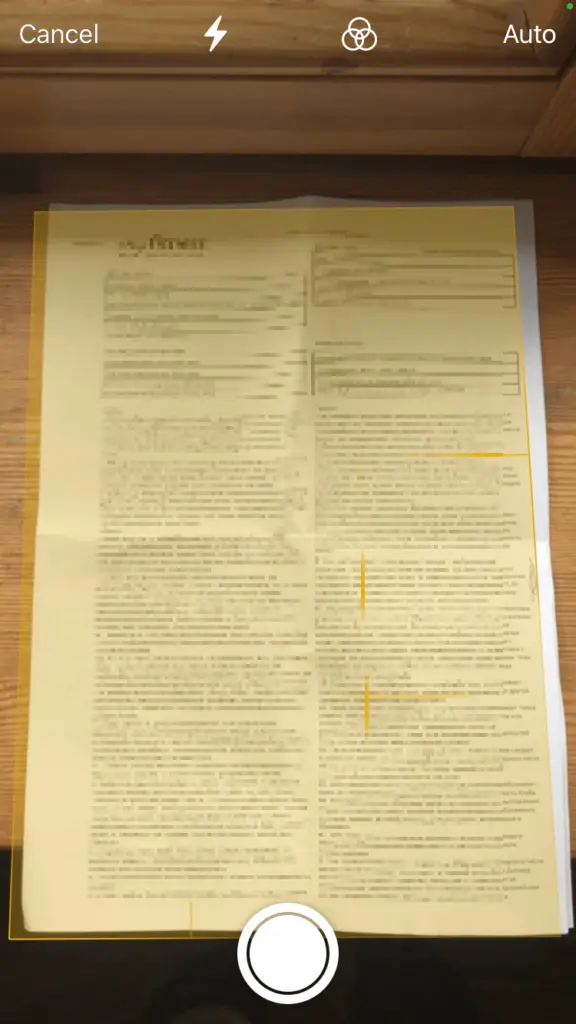
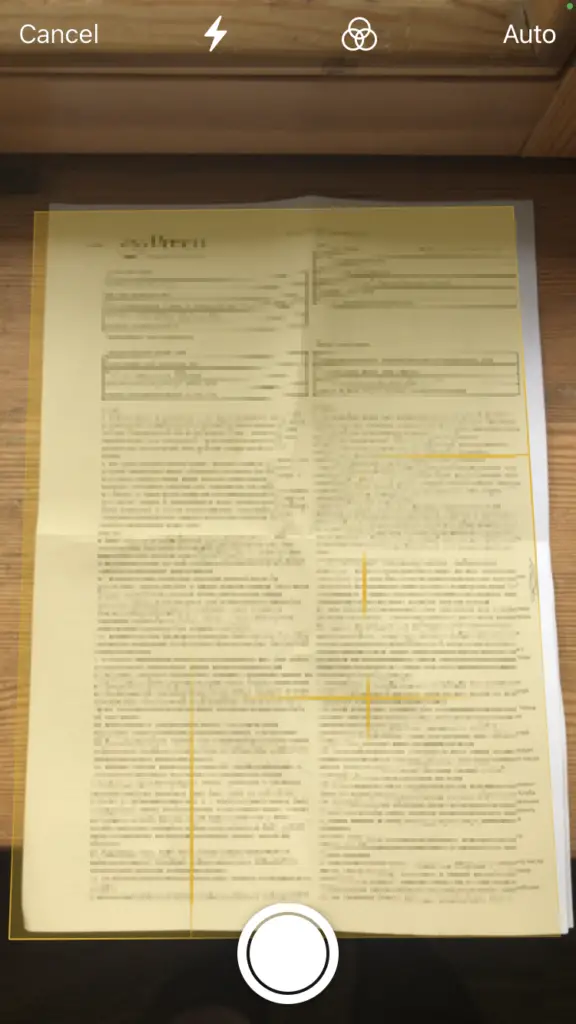
This will open the camera view and the iPhone will try to find a page to scan.
By default, the settings are set to Auto and will scan the page automatically when it thinks it found it. It’s extra annoying when you try to scan multiple pages and it takes a photo of the same photo multiple times because you weren’t fast enough to turn the page of the document.
Luckily, you can change that to Manual. This way you control when the photo will be taken.
The page will be highlighted in yellow, to show that iPhone thinks this is the area where the page is, so it will crop the picture to only include that part.
To scan multiple pages, just keep scanning next pages and they will be automatically added in one file.
How to export scanned documents on iPhone 8
The notes will now contain the file with your scanned pages. It will also attempt to name the file using the info provided on the first page. To export, don’t just press the share button in the top right corner. Because that will share the NOTE itself. You won’t be able to open it outside of the Notes application.
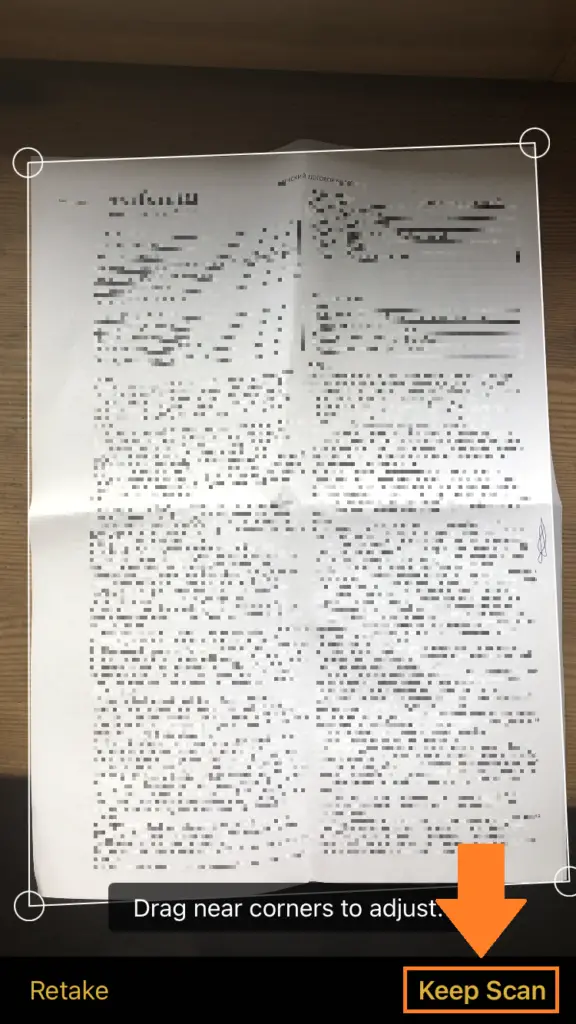
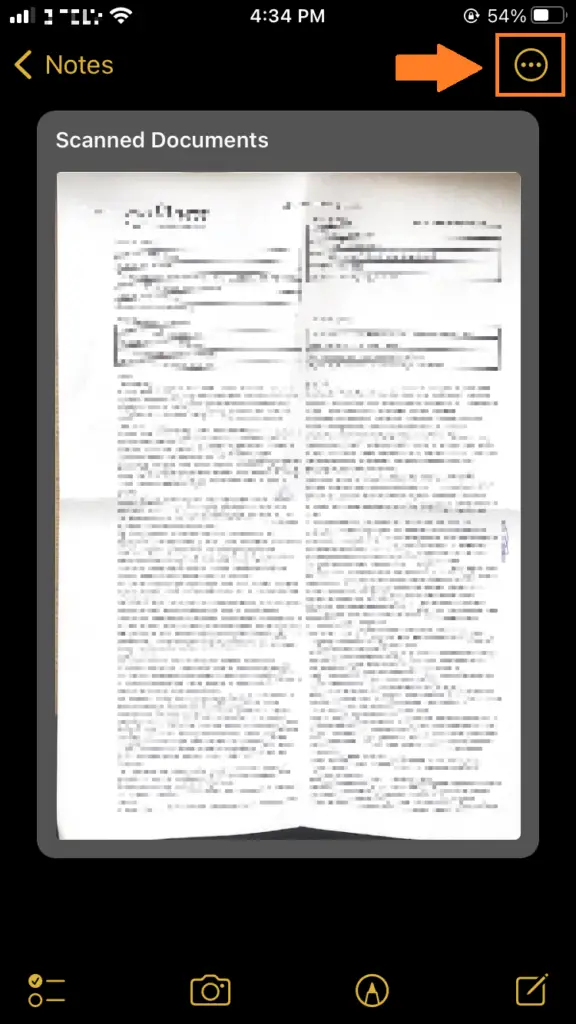
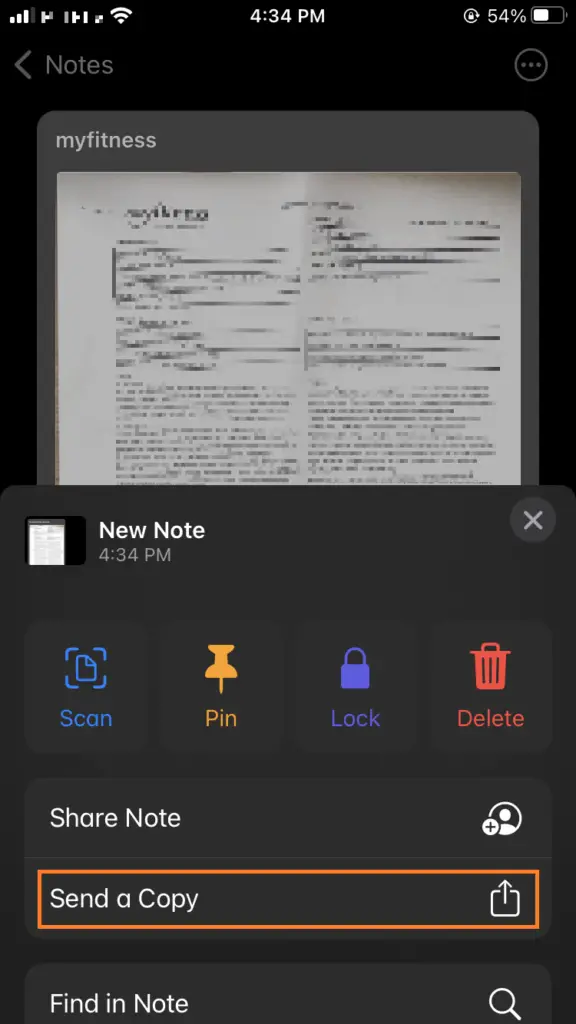
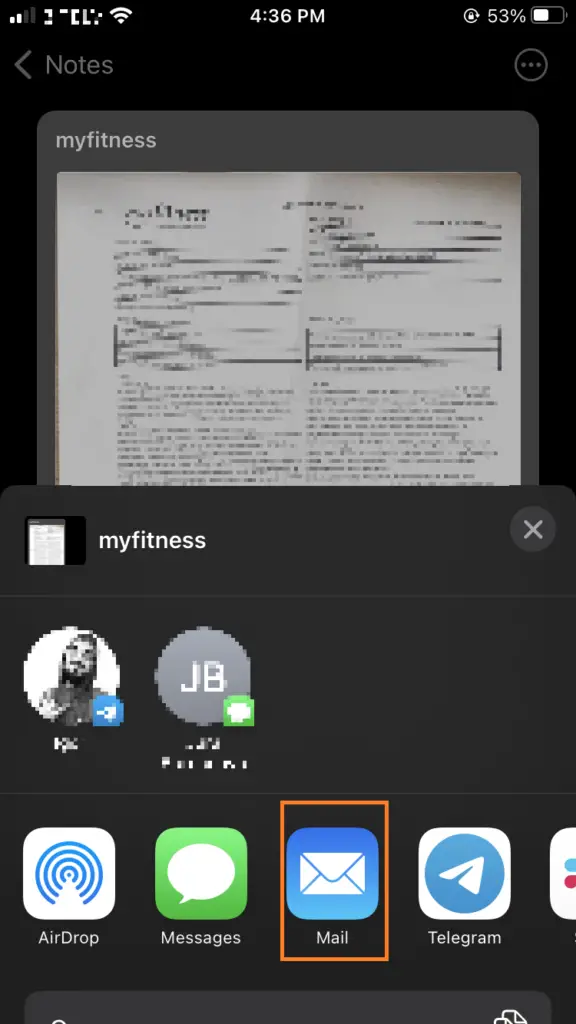
What you want to do is press on any page inside the document, and THEN press the share button. You will know everything worked as intended if the file you’re sharing will be in PDF format. You can then share the document in airdrop, email or another preferred way.
To Get a Clear Scan Result
There is some trick that will make your scan result clear and good. Yes, you can make a better result if you want.
To begin, you can tap the three circles icon at the top of the document scanning interface. So before shooting the photos of the documents, you’d better go to this menu. Ou can select some effect options such as color, black and white, and grayscale. Remember that the default setting is color mode.
Not only to use it, but you should also use the flash if you think it will make the scanning result looks better. To activate the flash, just tap on the flash icon on the top of the scanning interface. The default setting of flash is auto.
The last, make sure to focus your camera on your document. Make sure that the yellow box is in line with the edge of the document that you currently scan.